

I can’t believe the new school year is already here! Since school is coming up, I thought it would be great timing to do a haul for the 2017-18 school year. Here is an accumulation of the items I got this summer (see video description for where I got the items):
trying curling iron for the first time (fail!) vs. heatless overnight curls
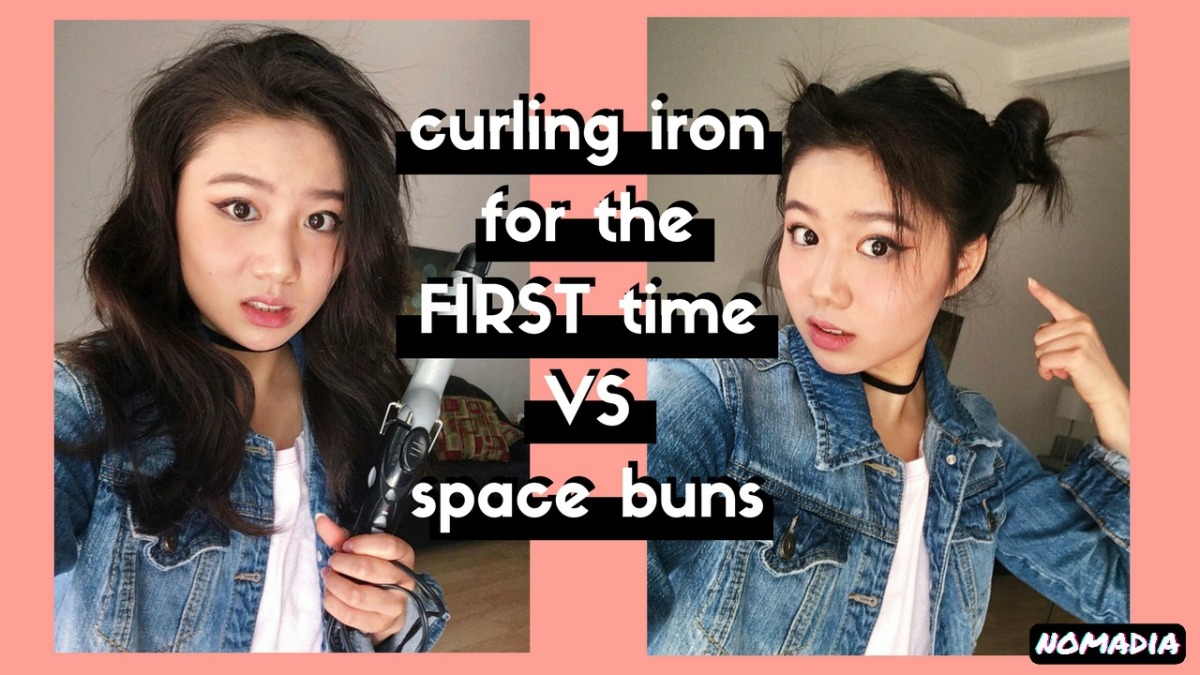
I used my Revlon Perfect Heat Curling Iron (that I have left sitting in the dust in my closet for many years) and attempted to curl my hair for the FIRST time and compared it with the usual overnight curl twin buns (aka space buns) method that I use.
With summer ending and the new school year coming up, I wanted to find quicker, easier methods of curling my hair for school days!
Using a CURLING IRON for the FIRST TIME
The Revlon Perfect Heat Curling Iron took me about 30-40 minutes to complete! BUT it probably me such a long time because it was my first time using a curling iron!
I was surprised that the curling iron curls stayed in for the most part throughout the whole day. My hair is the type that does not usually stay in place when I curl it!
Heatless Overnight SPACE BUNS Curls
Note: In the video there is a quick tutorial on how I put my hair up in twin buns for overnight curls!
I typically wear twin buns overnight for about 6-7 hours then take them out in the morning and spritz my hair with hairspray in the morning. If I don’t have time at night to put up my hair, I wear twin buns for about an hour in the morning, spritz my hair with hairspray, take my twin buns out then use hairspray again. With hairspray, the curls usually last throughout the day.
The negative: When doing the twin buns method, I never know how they are going to look in the morning! The curls can sometimes be unruly! Also, since you are putting your hair up in a hair tie overnight and the twin buns are tightly tied to your head, it is probably not the best method for when trying to care for your hair!
TIP: The tighter the twin buns are tied, the more the curl will likely stay throughout the day. I also recommend having damp or dry hair if you plan to do this method of curling your hair. Based on my own experience, having wet hair using the overnight curl twin buns method leaves my hair wet in the morning!
Which Method for School Days?
Based on my experience with curling my hair for the FIRST time using a curling iron, I don’t think I’ll be using the curling iron for school days. I took such a long time just trying to curl one piece of my hair! I’m going to stick with the overnight curl twin buns method for school days!
If you know how to curl your hair using a curling iron and think that this method works best for your hair, go for it!
What’s your favorite method to curl your hair? Do you have any suggestions for how to make your hair stay curly all day?
NOMADIA
i thought it was over… another post ceramic braces update
The ceramic braces journey never seems to end!
i got my ceramic braces off! pt. 2
Thanks so much for watching my Ceramic Braces Update videos, it was a lot of fun making these videos and hopefully they will help those who are getting ceramic braces or have ceramic braces! Good luck to those on their ceramic braces adventure!
i got my ceramic braces off! pt. 1
I’m back with another ceramic braces update. My camera’s battery suddenly ran out near the end of this video so stay tuned for pt. 2.
mixed emotions
I have mixed emotions about Mondays…


“Mixed Emotions” Mesh Panelled Hoodie | Forever 21
Black Jeans | Hollister
casual n’ comfy
When you have a test on the first week of school, the best thing to do is just dress comfortable!
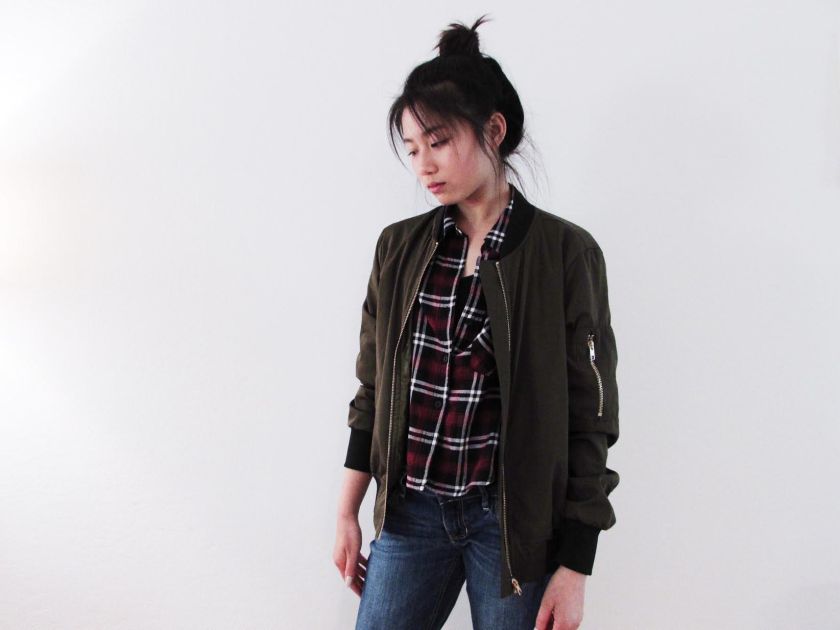
Plaid Shirt | Forever 21
Bomber Jacket | Nina’s
Jeans | Hollister
DIY- Decorate Your Composition Book!
I can’t believe it’s almost the end of summer! It’s time to start buying all those school supplies and finish doing that summer homework you probably haven’t even touched yet! I have a whole bag-full of untouched composition books waiting to be used for this school year, but they all look so boring and bland. So I thought, “Instead of going out to buy some expensive composition book with cute decorations and all that, why not decorate my own?” And that’s what I did! It might not look as professional as the ones in the store, but it’s original and my own! 🙂 Here I’ll show you how I made my DIY composition book!


Supplies you need:
- origami paper
- composition notebook
- scissors
- glue stick
- stickers (optional)
- masking tape (optional)
- printout of a character of your choice (optional)
Step one- Plan your design: Before you do anything to your composition book, think about how you would like to decorate your composition book. What theme would you like it to be? Cute? Silly? Inspirational? There are tons of endless ideas you can use, so plan it out carefully so you don’t mess up later on!
Step two- Snip, snip, snip!: Now that you have a design or theme in mind, it’s time to cut out all the shapes and backgrounds you would like to put on your composition book! Since I am using origami paper, I took advantage of all the different colors and patterns I had and cut out many different small rectangles.

Step three- Placement: Now that I’ve cut out my rectangles, it’s time to place them! Play around with how you want your layout to look like! I tried to keep mine nice and simple and created a tile pattern with the rectangles I cut out. Don’t forget to snip off the excess paper that may be hanging off your composition book!

Step four- Glue time!: After you know your layout, it’s time to glue those suckers down! I think it’s a lot easier if you put glue on the composition book first then place the rectangles, but that’s just my preference. 🙂 I also cut out a small printout of Rilakkuma and glued him on my composition book!
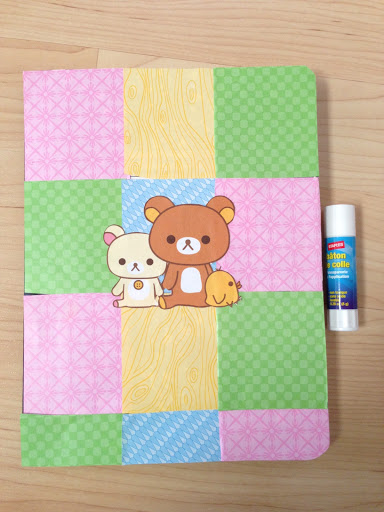
Step five- Stickers: I had so much fun decorating my composition book, but I felt that it still needed a little more detail here and there. I used some stickers I had lying around and placed them all over the cover of the notebook!

Step six- Lamination: Since I don’t carry around that expensive lamination paper with me, I use masking tape as an alternative! It might now turn out as clean or smooth as real lamination, but I think it’s better than nothing! I placed the tape in vertical strips along the front cover of the composition book, then did the same to the back!

And… Voila! Here is the final product:

I forgot to laminate it with masking tape before I took the picture, but this is what the front and back of my new and improved composition notebook looks like! 🙂 It’s so purdy!
I hope you liked this quick walk-through of how I decorated my composition notebook, and keep your eyes open for more blog posts!
ʕ´•ᴥ•`ʔ NOMADIA ʕ´•ᴥ•`ʔ
4 quick & easy hairstyles
Hairstyles that require no heat and use only 2 rubberbands!
tokyo and twin buns
I’ve never been to Japan but…
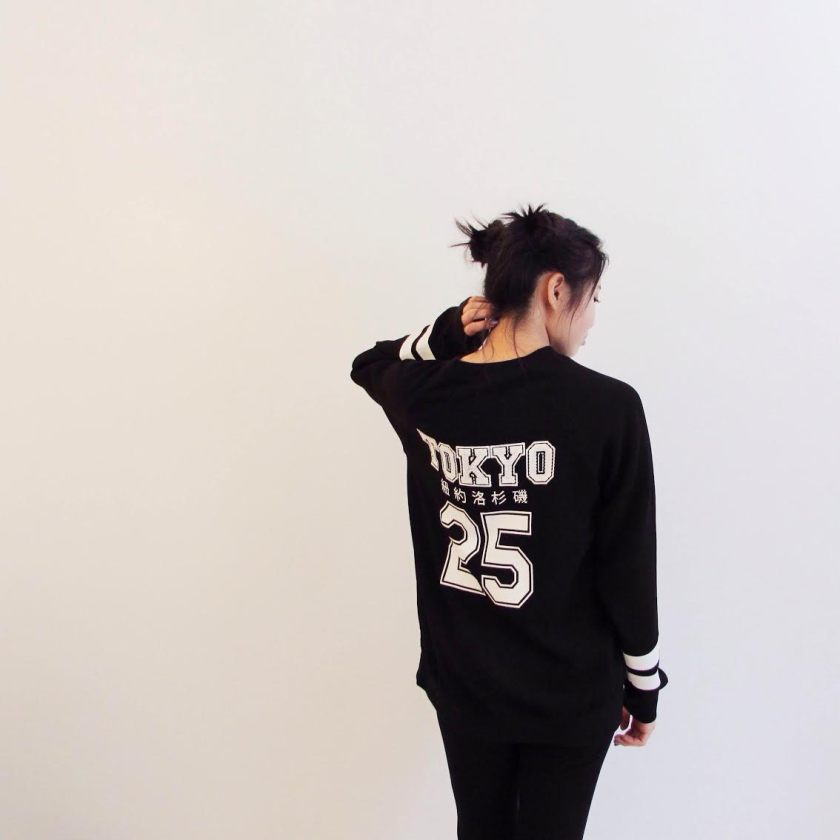
Top | Forever 21
